# MultiShip
# How to create a Multiship order in backend
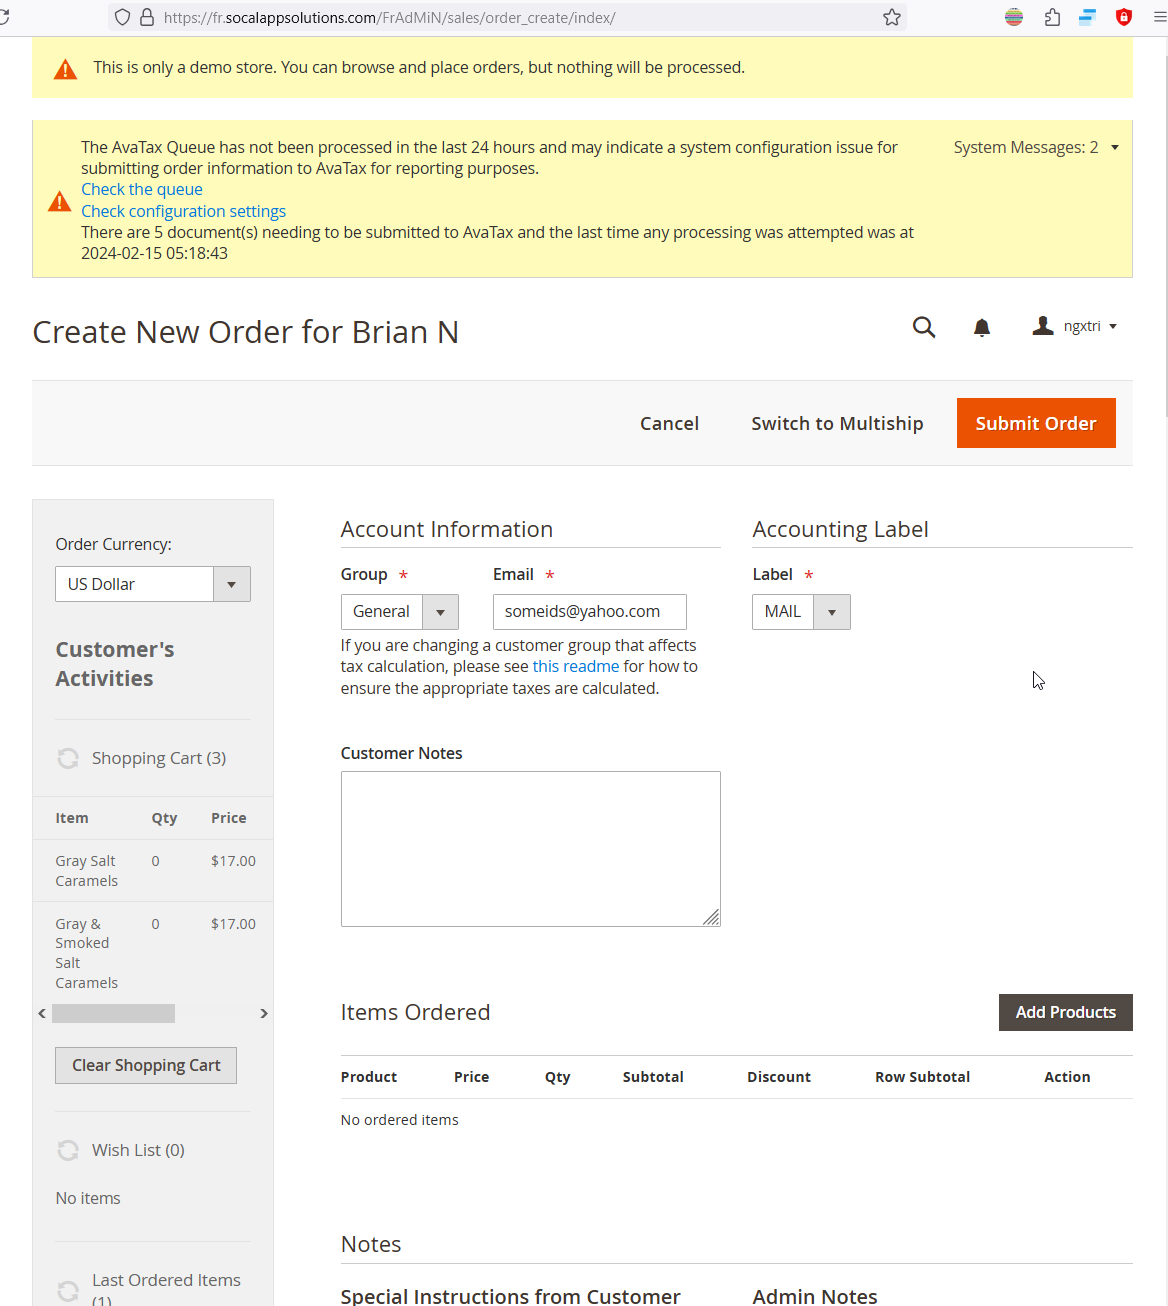
**Step 1: In backend; navigate to `Orders`. Click `New Orders`. Choose a customer**
[](https://frdocs.socalappsolutions.com/uploads/images/gallery/2024-07/image.png)
**Step 2: Click button `Switch to Multiship`**
Then click `Add Products` and add a few products to the order.
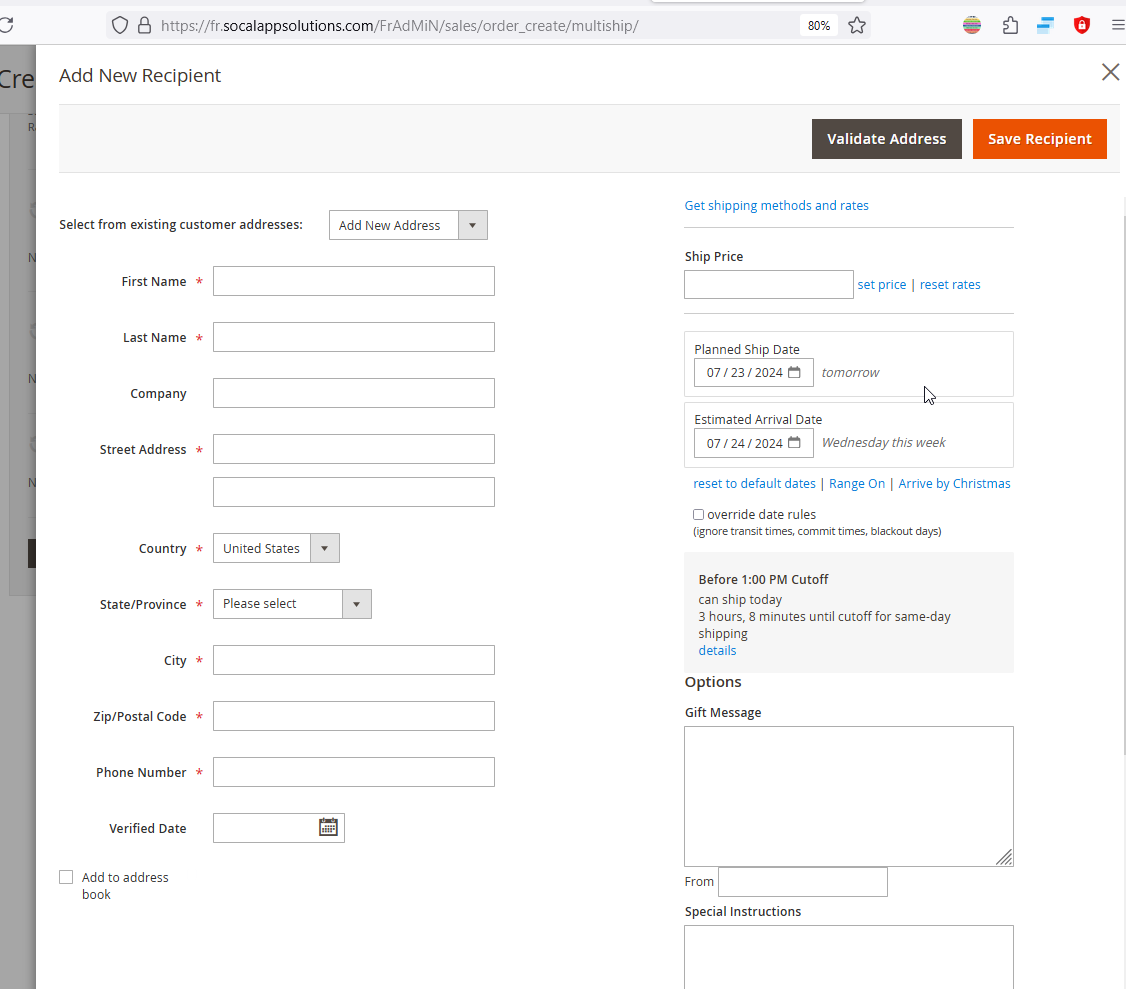
Then click `Add Recipient` to add a new shipping address:
[](https://frdocs.socalappsolutions.com/uploads/images/gallery/2024-07/ec6image.png)
**Step 3: Add shipping addresses**
In the popup the add new recipient, choose an existing address; or add new address. Click Get Shipping Methods And Rates and confirm the shipping method. When done, click `Save Recipient`.
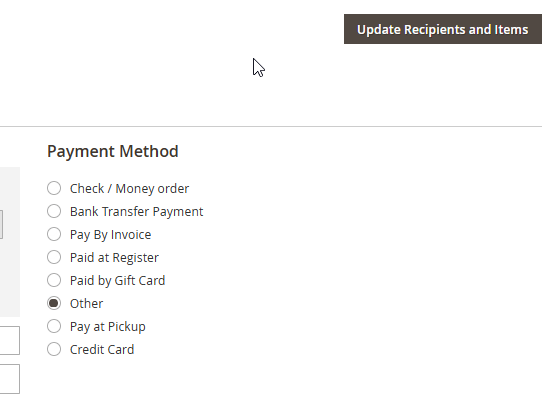
After adding a new recipient, choose quantities for each products. When done, click button `Update Recipients and Items`. And choose a payment method
[](https://frdocs.socalappsolutions.com/uploads/images/gallery/2024-07/qdXimage.png)
Step 3b: Upload recipients
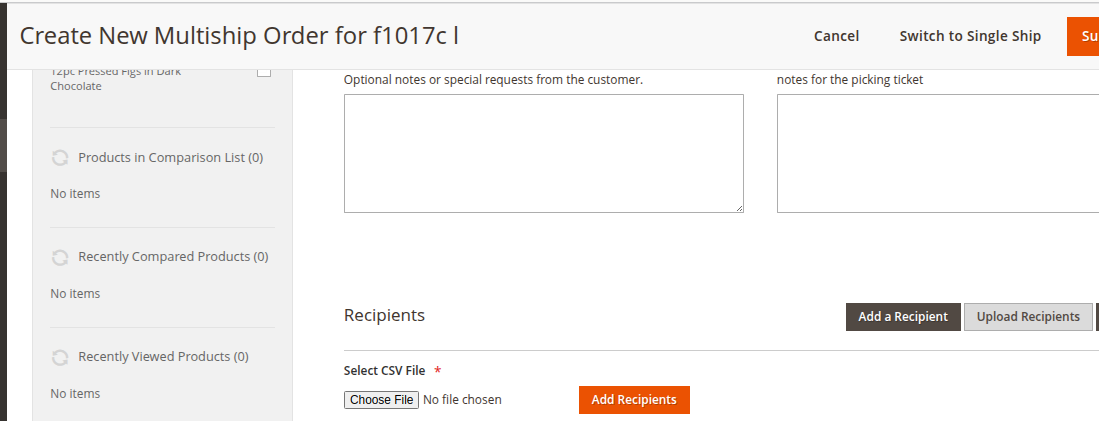
Admin can also upload recipients using a csv file. Click button Upload Recipients
[](https://frdocs.socalappsolutions.com/uploads/images/gallery/2025-01/image.png)
Then choose a csv file from your computer; and click `Add Recipients`
Note that upload recipients will wipe out all existing QAs.
Click `Submit Order` to create the order.
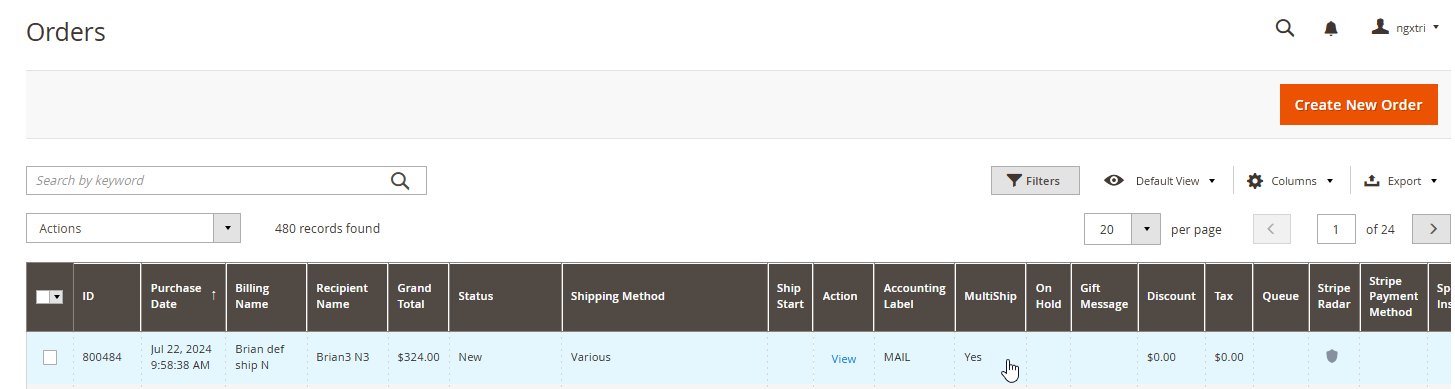
Confirm the order is created, and its status should be `New`. In the `Orders` grid; the column `Multiship` is Yes
[](https://frdocs.socalappsolutions.com/uploads/images/gallery/2024-07/MqHimage.png)
# DEV Create MS in BE
Dev note: Backend create MS order
Button `Update Recipients and Items` : Frans/MultiShip/view/adminhtml/templates/order/create/multiship/shipping\_assignments.phtml
```
$block->getButtonHtml(__('Update Recipients and Items'), 'order.updateQuoteAddressItems(),order.itemsUpdate()',
```
Click handler is located at Frans/MultiShip/view/adminhtml/web/js/order/create/scripts-multiship.js, function updateQuoteAddressItems
Upload Recipients:
Most logics and validations are in `app/code/Frans/MultiShip/Controller/Adminhtml/Shipment/UploadRecipients.php`
# How to create Credit Memo per specific shipping address
In Magento, a Creditmemo can be assigned to a specific shipping address. This guide shows how we perform credit memo per shipping address.
1/ Create a MS order. For example, create a MS order has 2 quote addresses (QA)
2/ Ship the two QA. Print the label. Click button `Daily Ship and Capture` to generate the invoice
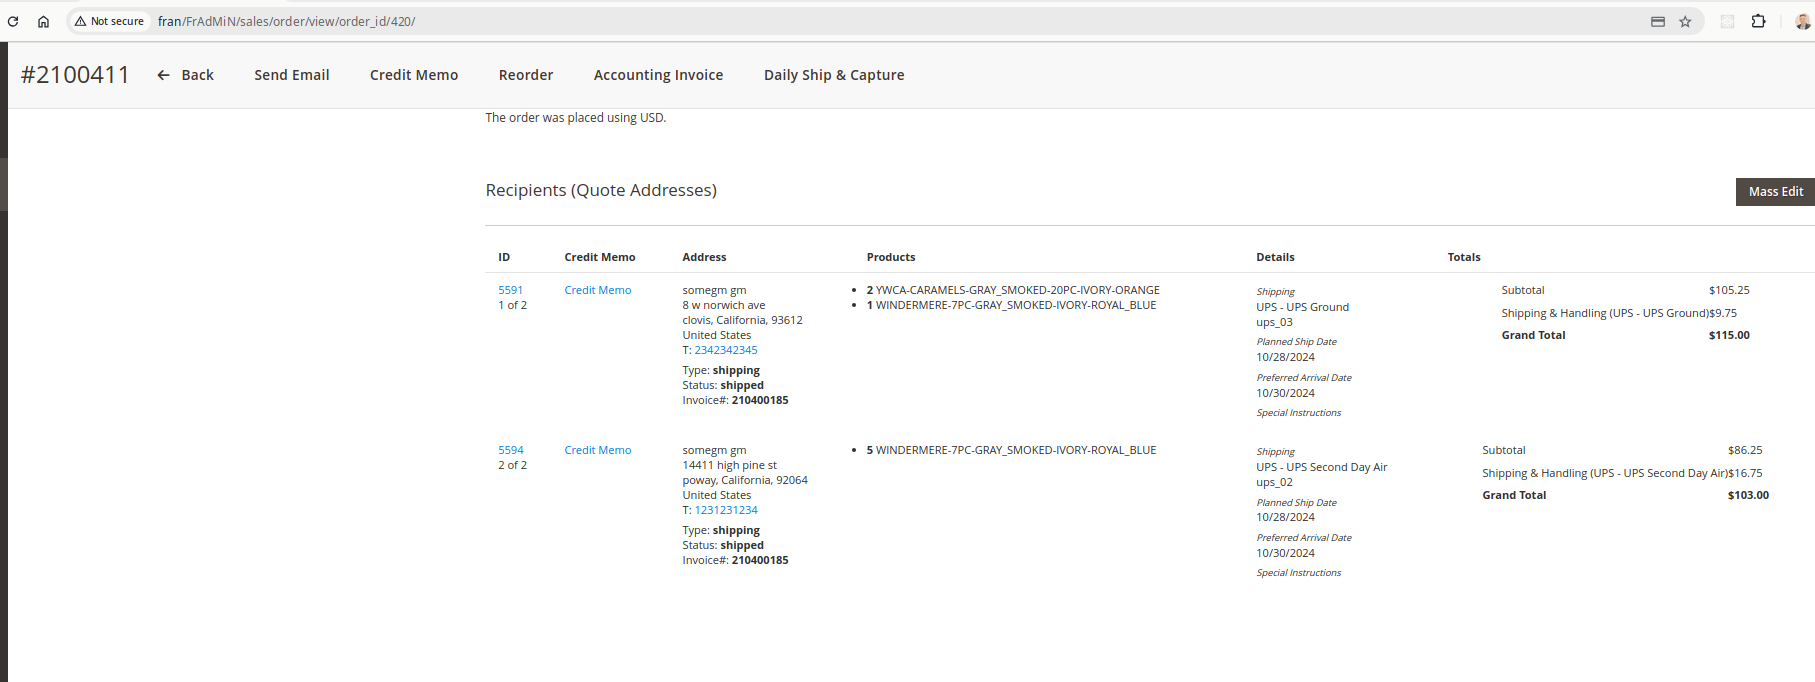
3/ Now that the MS order is invoiced, go to BE MS order. Each shipped quote address should have a `Credit Memo` button:
[](https://frdocs.socalappsolutions.com/uploads/images/gallery/2024-10/image.png)
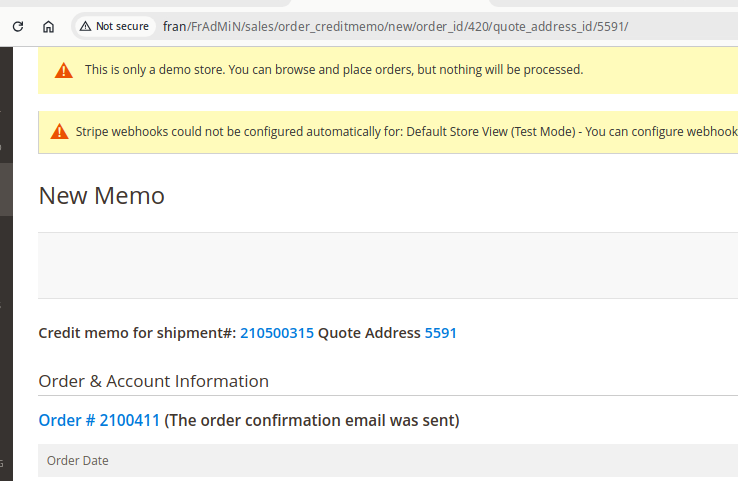
4/ Click the button `Credit Memo` to create a new credit memo for QA 5591:
[](https://frdocs.socalappsolutions.com/uploads/images/gallery/2024-10/qDHimage.png)
Verify that the New Memo page shows the correct shipment # and Quote Address number
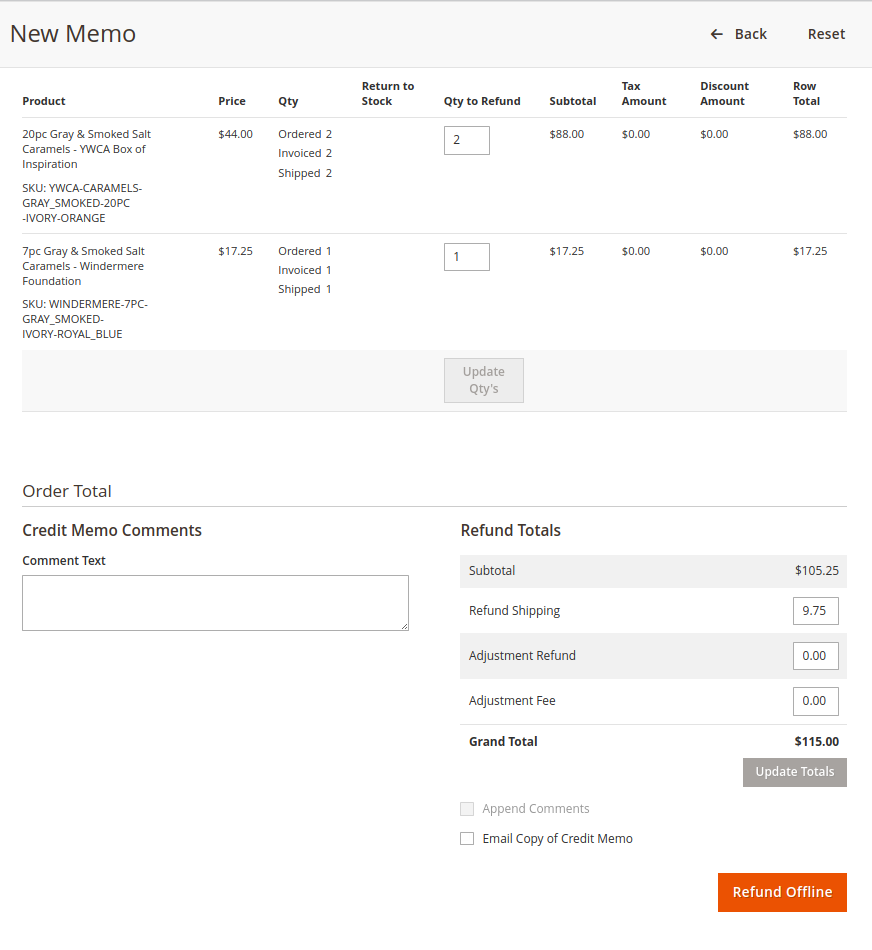
5/ Verify Qty and Subtotal of items:
[](https://frdocs.socalappsolutions.com/uploads/images/gallery/2024-10/AODimage.png)
Only items and Qty of the selected QA 5591 is shown. Click button `Refund Offline` to create Credit Memo.
6/ Verify that the Order now does reflect the refunded Qty and Amount:
[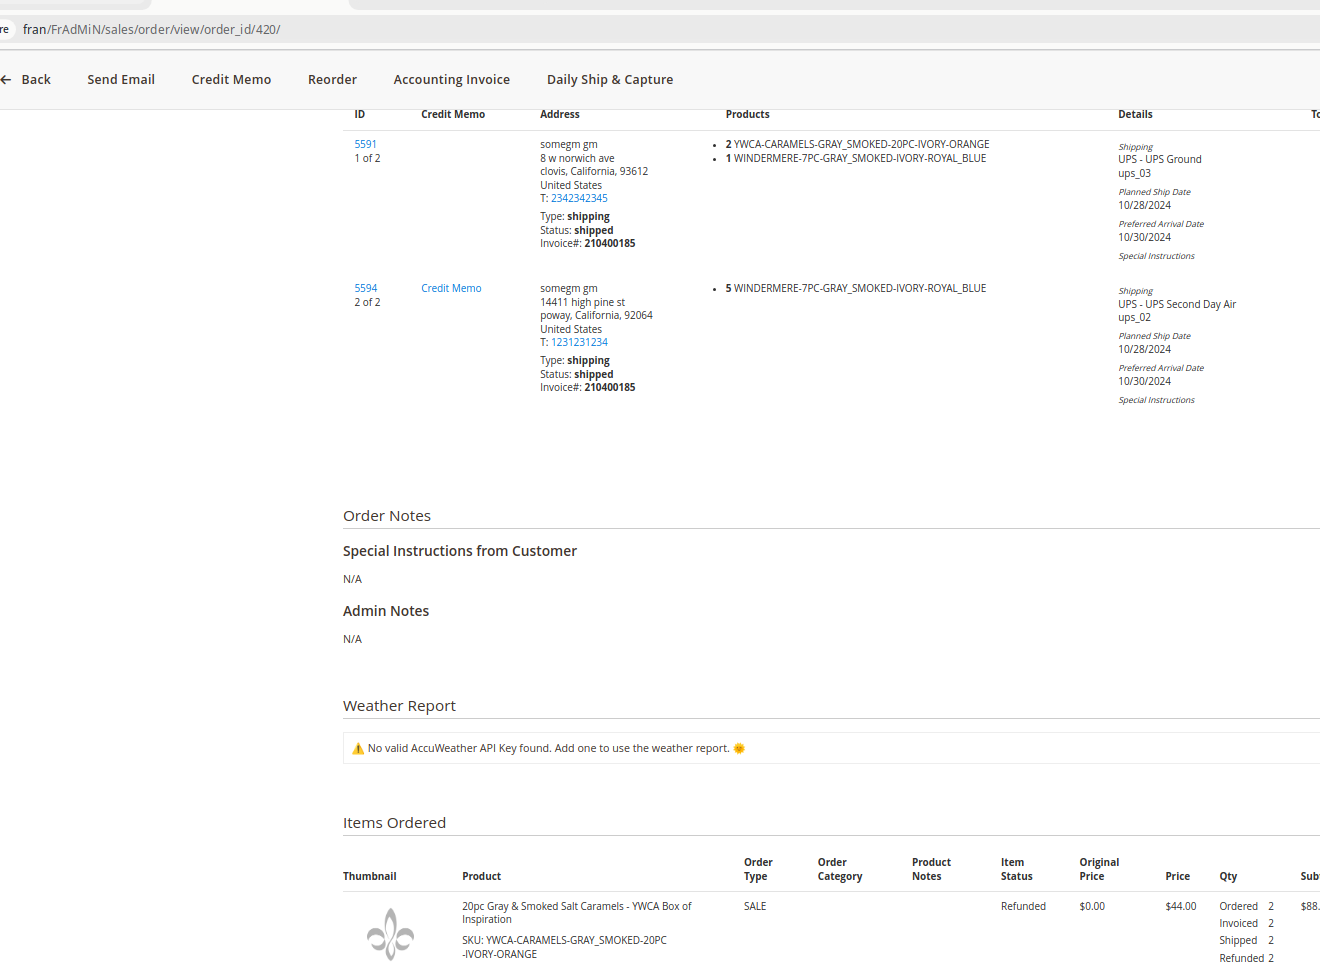](https://frdocs.socalappsolutions.com/uploads/images/gallery/2024-10/lFBimage.png)
7/ When all shipments of the order have been refunded, the order is automatically closed.
# Front end Multiship
To enable Multiship in FrontEnd, first we need to enable it in config:
Under Frans' Module , Multiship, Enable Front End Multiship, select Enable:
[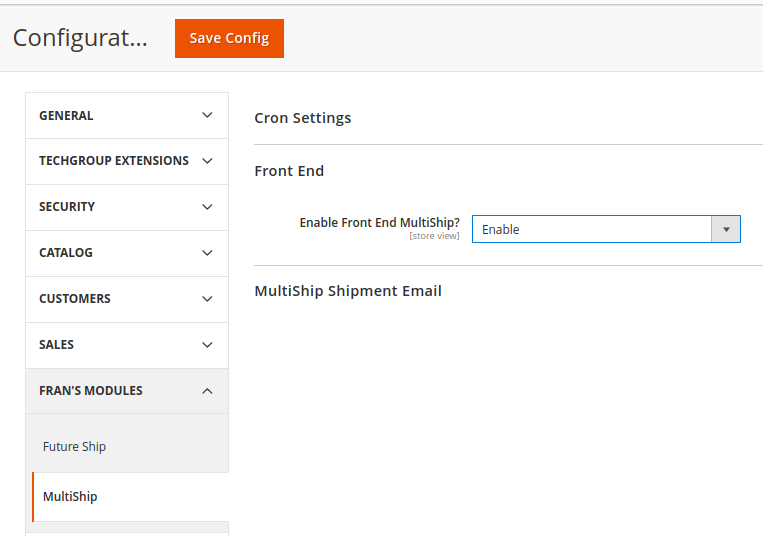](https://frdocs.socalappsolutions.com/uploads/images/gallery/2024-12/image.png)
Click `Save Config`.
During Front-End checkout, log in, and button `Ship to Multiple Addresses` will be shown:
[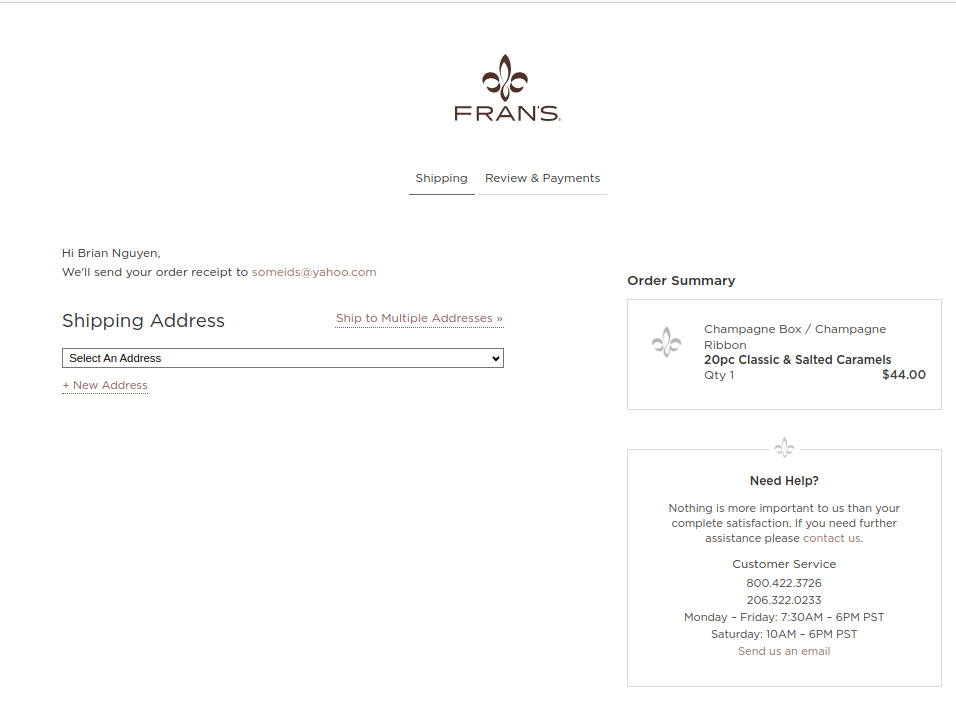](https://frdocs.socalappsolutions.com/uploads/images/gallery/2024-12/Ufiimage.png)
Multi-ship front end checkout will be shown:
[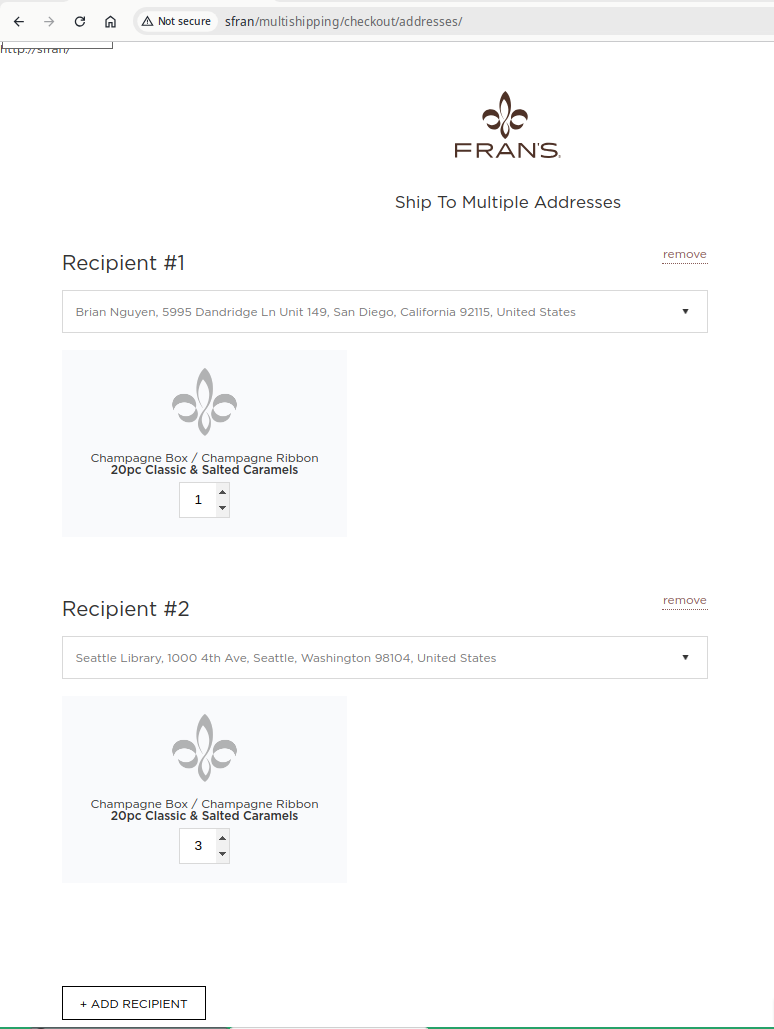](https://frdocs.socalappsolutions.com/uploads/images/gallery/2024-12/iAeimage.png)
# Cron job to create partial invoice and send email of MS orders
First of all, configure cron schedule in Config --> Frans --> MultiShip --> Cron Settings
[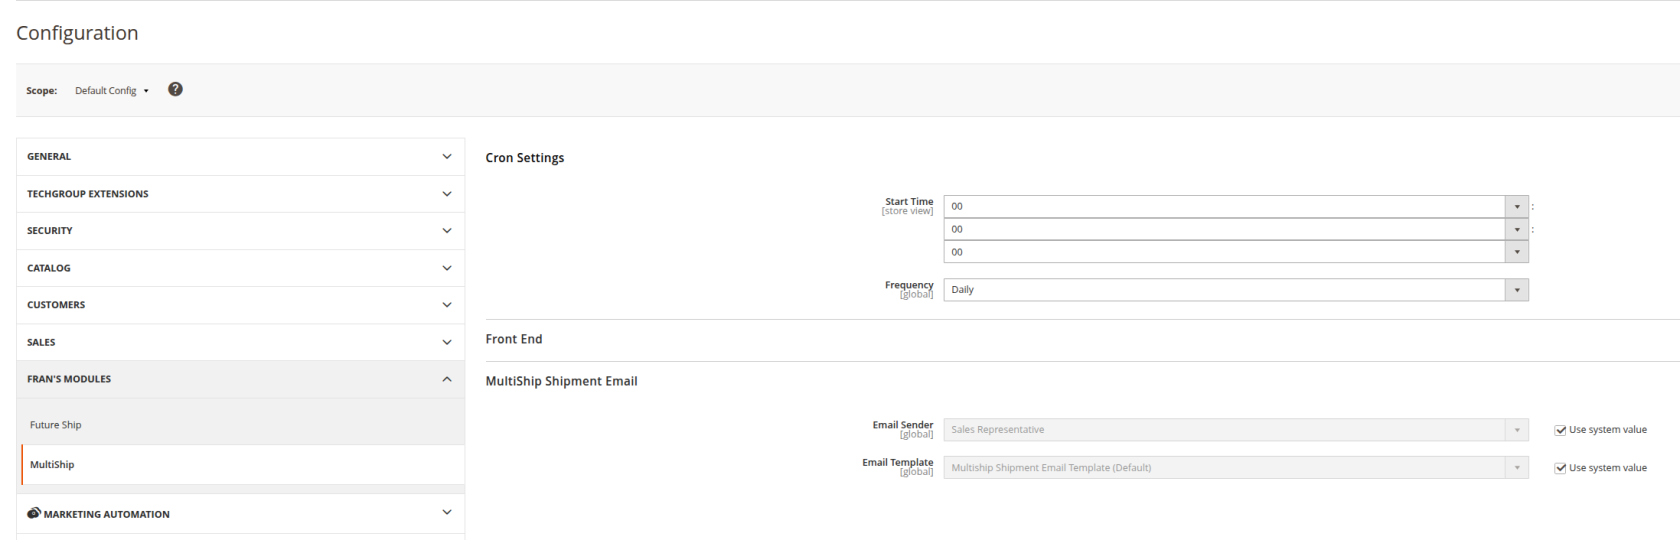](https://frdocs.socalappsolutions.com/uploads/images/gallery/2025-01/vZhimage.png)
Then execute ./bin/magento cron:run
Make sure table `cron\_schedule` has rows with job\_code='multiship\_shipment\_email\_cron'
Each cron execution will create logging rows into table `frans\_ship\_email\_log`
\_\_\_\_\_
To debug the cron:
1/ Sql to find shipments not invoiced:
```
SELECT *,shipment_status from sales_shipment
where invoice_id IS NULL AND ms_email_sent_at IS NULL AND created_at > date_sub(now(),INTERVAL 3 day)
and shipment_status in (4,11)
```
# Quote payment link
**Step 1: In the backend, navigate to Sales > Quotes. Open the desired quote and click Get Payment Link.**
[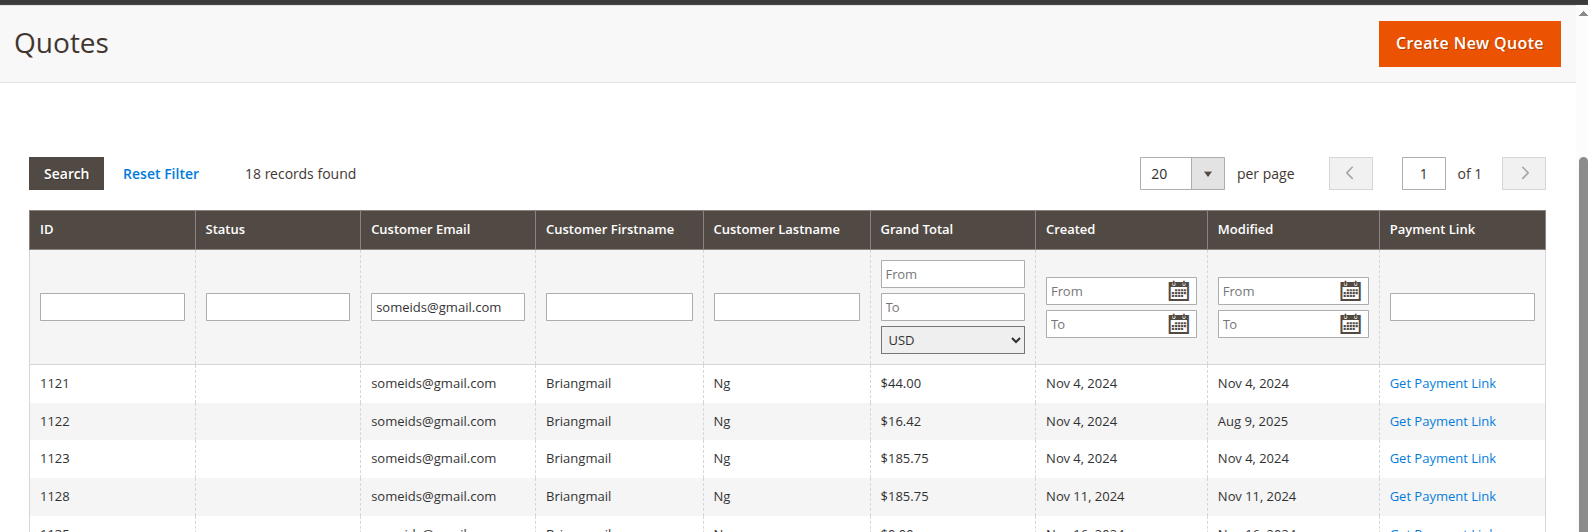](https://frdocs.socalappsolutions.com/uploads/images/gallery/2026-06/MMqimage.png)
- Quote number, customer name/email, creation date, and grand total
- A full breakdown of order items, subtotal, discount, shipping, tax, and grand total
- The quote type badge (Multiship or Single Ship)
**Step 2: Click the button `Copy Link`**
[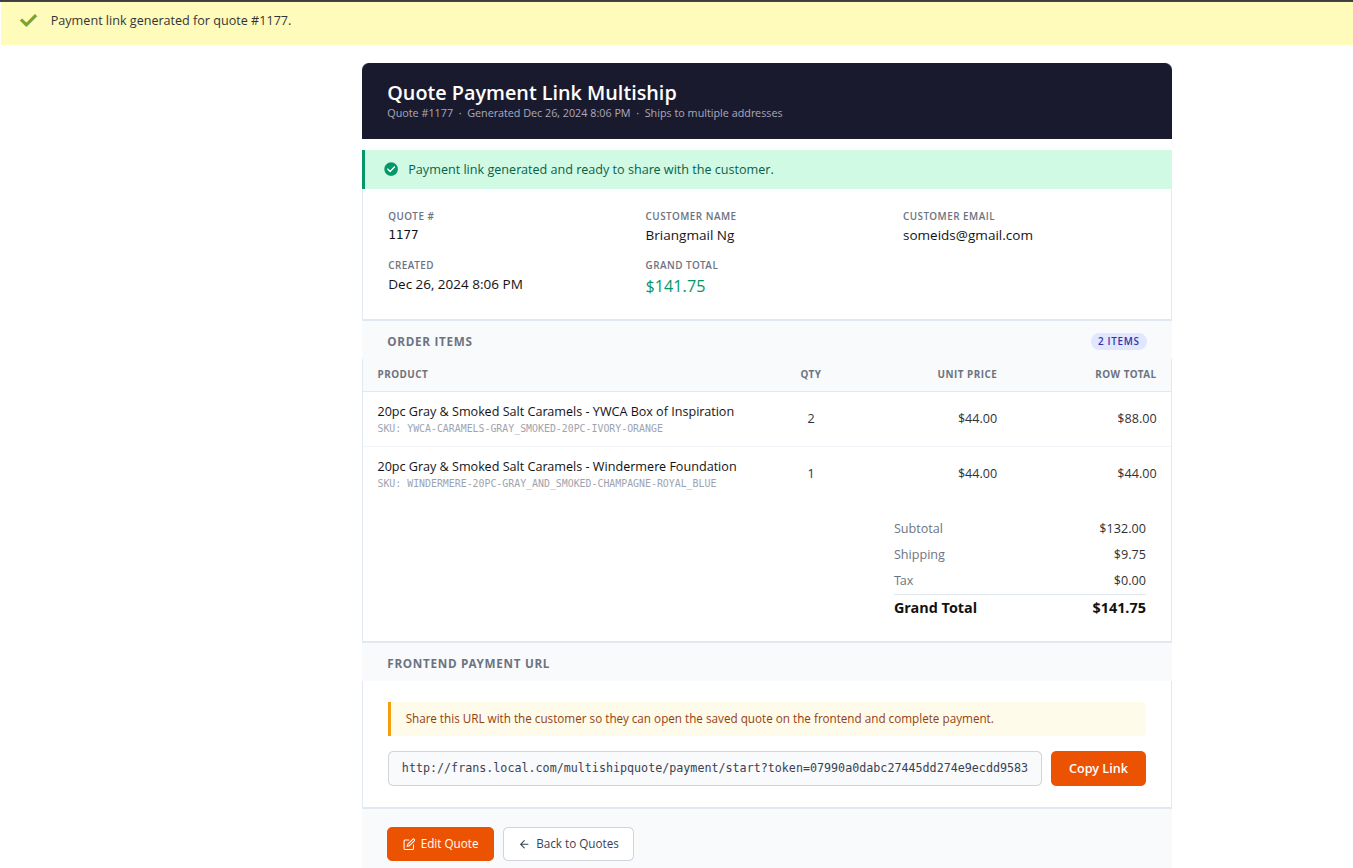](https://frdocs.socalappsolutions.com/uploads/images/gallery/2026-06/6OPimage.png)
You can also click Edit Quote to make changes to the quote before sharing, or Back to Quotes to return to the quotes list.
[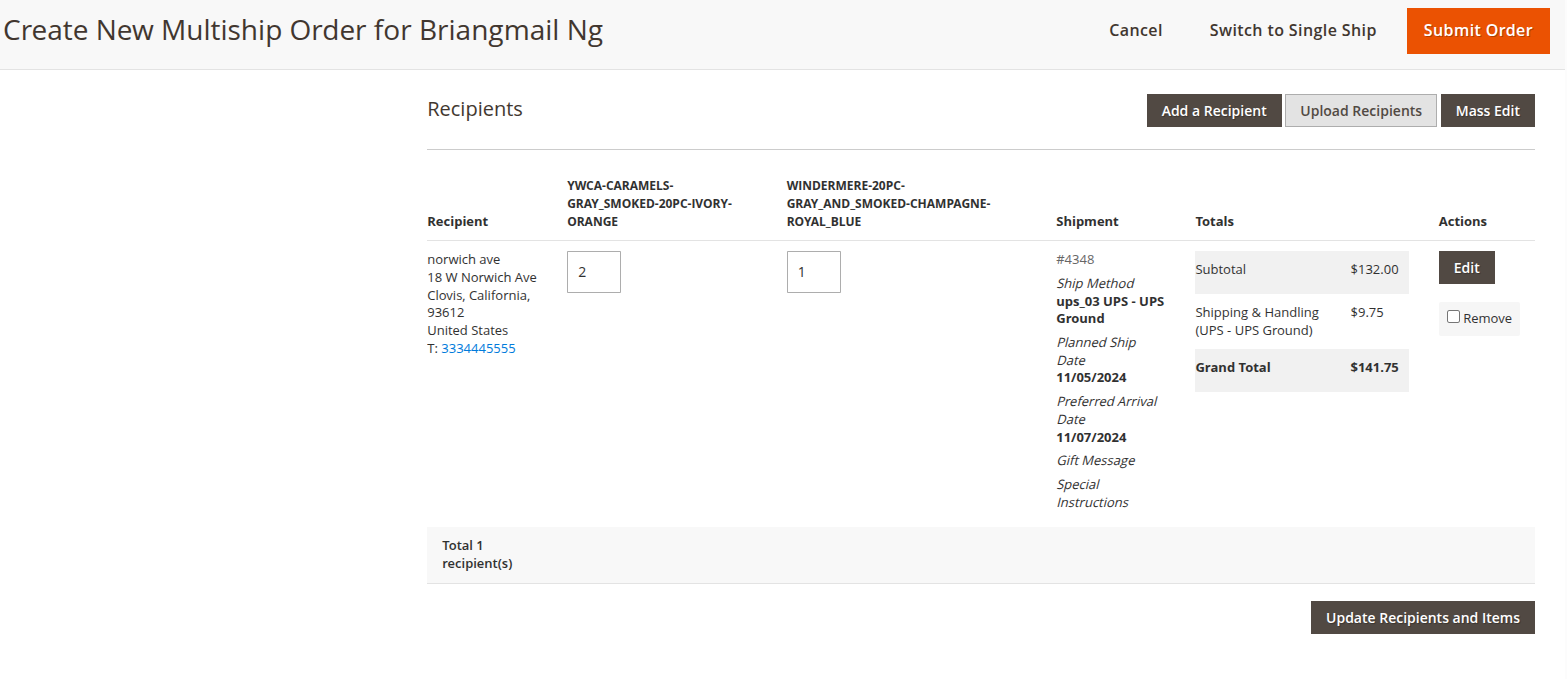](https://frdocs.socalappsolutions.com/uploads/images/gallery/2026-06/19limage.png)
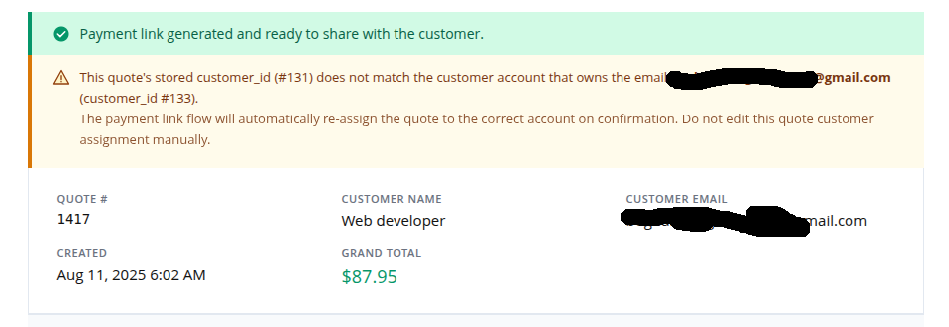
▎ Note: If the quote's stored customer does not match the email on the account, a warning banner is shown. The system will automatically re-assign the quote to the correct customer when they confirm do not manually edit the customer assignment.
[](https://frdocs.socalappsolutions.com/uploads/images/gallery/2026-06/mRtimage.png)
**Step 3: Send the link to the customer.**
- When the customer opens the link, they are shown the quote review page.
[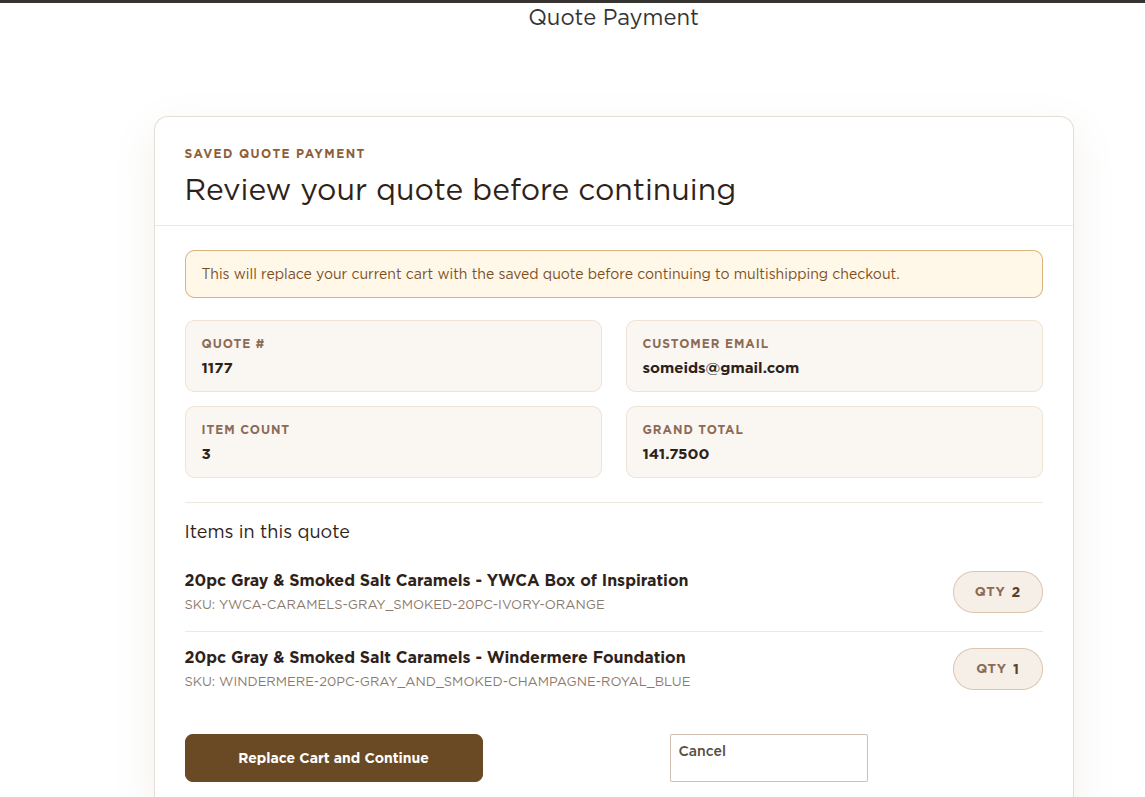](https://frdocs.socalappsolutions.com/uploads/images/gallery/2026-06/5mtimage.png)
- If the customer is not logged in, they are redirected to the login page first, then automatically returned to the payment flow after sign-in.
- If the customer is logged in, they are taken directly into the checkout flow.
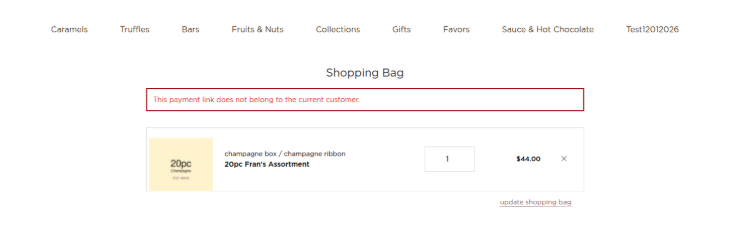
- The link validates that the customer's account email matches the quote email. If it does not match, access is denied.
[](https://frdocs.socalappsolutions.com/uploads/images/gallery/2026-06/5emimage.png)
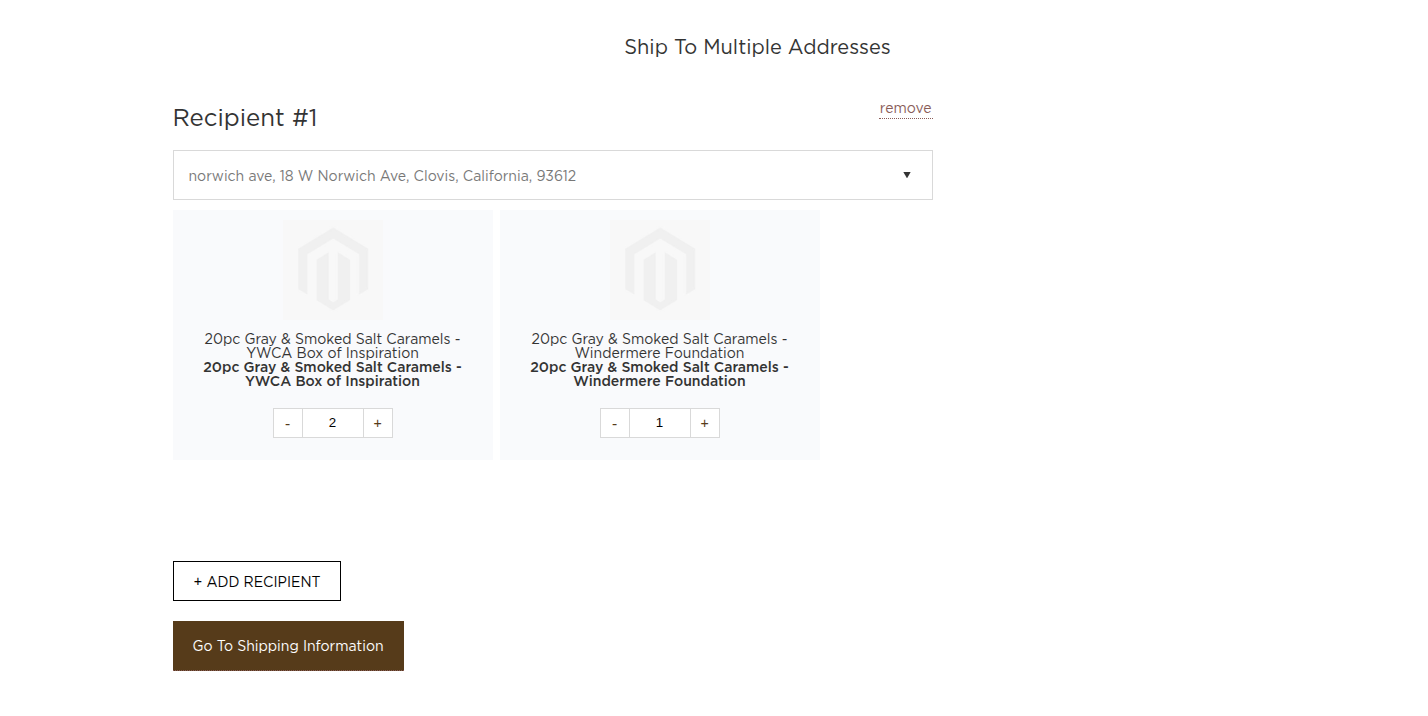
**Step 4: (Customer — Multiship quotes): The customer is taken to the Multiship Addresses step where they can review or adjust recipient assignments, then proceed through shipping and payment to place the order.**
[](https://frdocs.socalappsolutions.com/uploads/images/gallery/2026-06/KMvimage.png)
- (Customer — Single-ship quotes): The customer is taken directly to the standard Checkout page to complete payment.
▎ Notes:
The payment link is single-use — it is deactivated after the customer confirms and enters the checkout flow.
If the customer already has an active cart, it is automatically retired when the payment link quote is loaded.
The link does not expire based on time, but the underlying quote must still be active.
**Overview of the feature functionality :**
- The link is tied to the saved quote and is intended for the quote owner.
- If a different customer opens the link, access is blocked.
- The current cart is not replaced until the customer confirms the action.
- The payment link expires after 7 days and cannot be used once it is expired.